Git is a popular version control system that helps developers track and manage code changes. It is widely used in the development community and has become an essential tool for software development teams. Visual Studio Code (VS Code) is a popular code editor that supports Git integration, making it easy to use Git source control in VS Code within your development environment.
In this blog, we’ll explore how to use Git source control in Visual Studio Code and provide you with guidelines to make the most out of this powerful tool. Whether you’re a seasoned developer or just starting out, you’ll learn the easy way to incorporate Git source control into your workflow, manage code changes, and collaborate with your team. Let’s dive in and make the most of Git source control in Visual Studio Code!
Using Git Source Control in VS Code
Source control management (SCM) is built into Visual Studio Code, and it comes pre-configured with Git support. The VS Code Marketplace’s extensions offer access to a wide range of additional source control providers.
Creating a Git repository
Ensure that Git is already installed. You must first install Git in order to access these features because VS Code will use your computer’s Git installation (at least version 2.0.0).

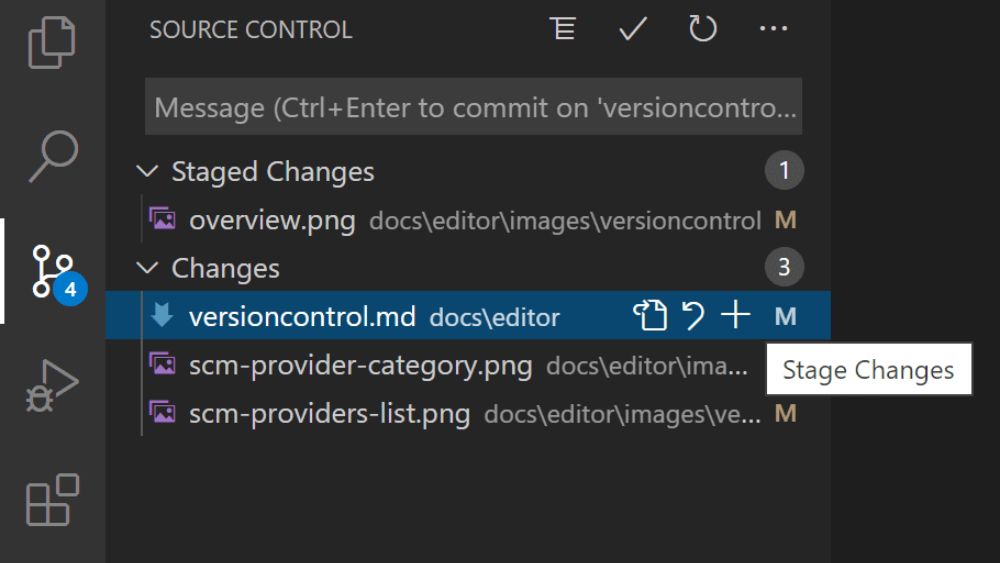
You can always see a summary of the number of changes you currently have in your repository by clicking the Source Control icon in the Activity Bar on the left. By clicking the icon, you can view information about the CHANGES, STAGED CHANGES, and MERGE CHANGES in your current repository.
You can view the specific text changes made to each file by clicking on each item. You can still edit the file using the editor on the right for unstaged changes, so feel free to do so!
The current branch, dirty indicators, and quantity of incoming and outgoing commits for the current branch are additional repository status indicators that can be found in the bottom-left corner of Visual Studio Code. By clicking that status indicator and choosing the appropriate Git reference from the list, you can check out any branch in your repository.
Commit
Drag and drop or contextual actions within the files are both acceptable methods for staging (git add) and unstaging (git reset).

To commit the changes, type a commit message above them and press Ctrl+Enter (macOS: Windows+Enter). Only changes that have been staged, if any, will be committed. If not, you’ll be given the option to modify your commit settings and be prompted to choose which changes you want to commit.
This process works really well, in our opinion. In the previous screenshot, for instance, only the staged changes to overview.png will be included in the commit. The modifications to versioncontrol.md and the two additional .png images could be added as a separate commit in later staging and commit actions.
On the Source Control view’s top menu bar, under Views and More Actions…, are more precise Commit actions.

Cloning a repository
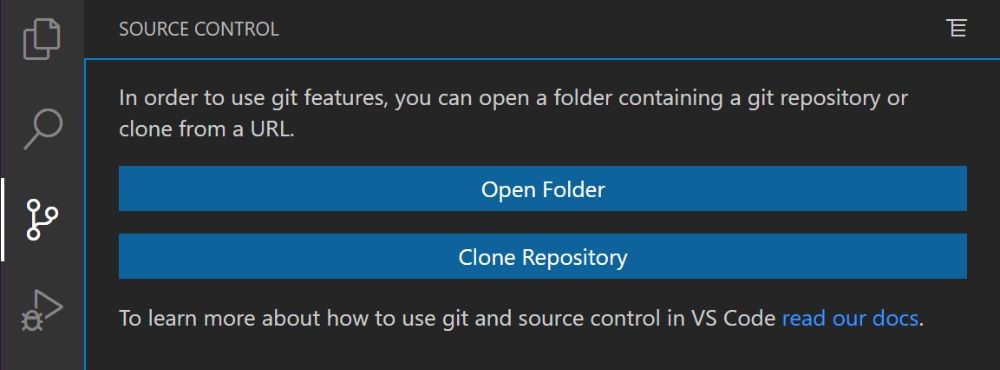
In the Source Control view, you have the choice of opening a folder from your local computer or from a repository that has been cloned if you haven’t already done so.

If you choose Clone Repository, you will be prompted for the URL of the remote repository (such as one hosted on GitHub) and the parent directory to place the local repository under.
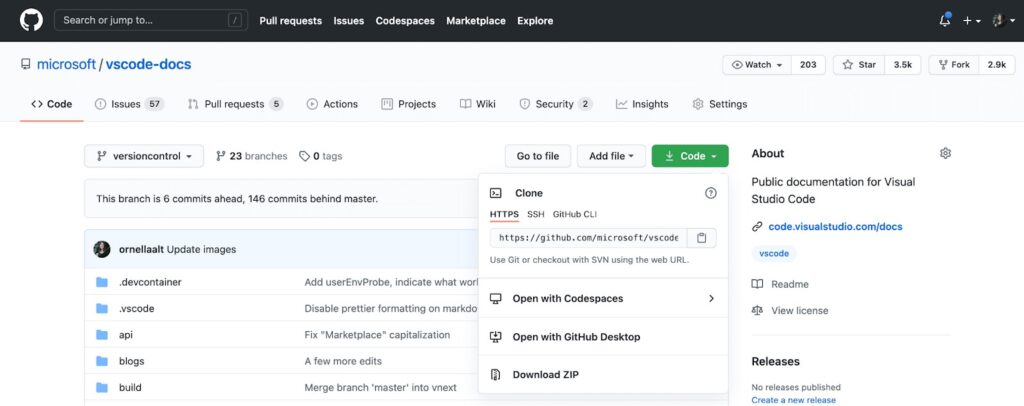
The GitHub Code dialog is where you would discover the URL for a GitHub repository.

After that, the URL is copied and pasted into the Git: Clone prompt.

There is also a GitHub Clone option available. You can search through repositories by name and choose any repo to clone after authenticating with your GitHub account in VS Code. You can also start the flow to clone a Git repository with the Git: Clone command in the Command Palette (Ctrl+Shift+P).
Branches and Tags
Using Git, you may directly create and check out branches in Visual Studio Code. Branch creation and Git are performed by using the Checkout to Commands (Ctrl+Shift+P) command prompt option.
Every branch or tag in the active repository will be listed in a dropdown menu when you run Git: to check out.
You can also choose to check out a branch in detached mode or, if you think it would be better, establish a new branch.

A new branch can be rapidly created with the Git: Create Branch command.
Remotes
VS Code provides you with helpful actions to push, pull, and sync that branch if your repository is connected to a remote. Your remotes’ changes can be periodically fetched by VS Code.
Merge Conflicts

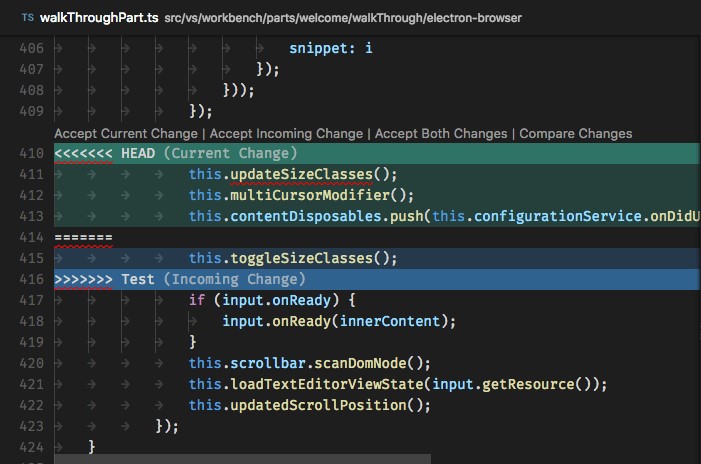
VS Code can identify conflicts with merges. The differences are indicated, and there are inline actions to accept either one of the modifications or both of them. Staging the conflicting file will allow you to commit the changes once the conflicts have been resolved.
Conclusion
Using Git source control in VS Code can greatly simplify and enhance your development workflow. With its ease of use and intuitive interface, you can now manage your code changes, keep track of bugs, and collaborate with your team members with ease.
Whether you’re a seasoned developer or just starting out, following these guidelines will help you leverage the full potential of Git source control in Visual Studio Code. By incorporating version control into your workflow, you’ll ensure that your code remains safe, organized, and ready for collaboration.


